Drawstring gift bags are ideal for a waste-free life (very simple!). These reusable bags can be enjoyed long after the gift is opened.
![]()
![]() This kind of bag is a great variant for storing anything, such as produce bags, sewing tools, office supplies, or they can be perfect household or beach supplies.
This kind of bag is a great variant for storing anything, such as produce bags, sewing tools, office supplies, or they can be perfect household or beach supplies.
Great gift ideas for housewarming, birthday, mother's day, father's day, etc.
![]()
![]()
This is a good model to start. Very suitable for novices. Simple and fast, only a few consumables are needed.
![]()
![]()
Each size can be made into a bag, which is very suitable for placing books, glasses, shirts, toys, etc.![]() DIMENSIONS:
DIMENSIONS:
XS: 6 x 6 inches
S: 8 x 8 inches
M: 10 x 10 inches
L: 12 x 12 inches
XL: 14 x 14 inches
![]()
![]()
PRETTY DRAWSTRING POUCH {TUTORIAL}
![]()
1. Using the template, cut out two outer pieces , and two lining pieces .
2. Place the two outer pieces with the right sides facing. Stitch around from one side to the other, leaving the top open. Clip corners. Press.
3. Place the outer pouch on top of the lining panel and make a mark with a water soluble pen, just above the stitching line on both sides (as marked in Photo 3). Pin the two lining pieces together with the right sides facing. Stitch from the mark on one side around to the mark on the other side. Clip corners. Press.
4. Clip the seam of the lining at a 45 degree angle as shown in Photo 4. Repeat for each side. Press the seam allowance open. This will form part of the casing.
5. Stitch around the seam allowance on both sides of the casing as shown in Photo 5.
6. Turn the floral part of the pouch so that the print is facing outwards. Place the lining inside the pouch. There will be 3/4 inch (2 cm) of the lining showing at the top and this will form the casing. Press this part of the lining down so that it is level with the top of the pouch. Fold under 1/4 inch along the edge of the casing.
7. Pin the casing in place.
8. Stitch along the top and bottom edge of the casing. Cut the ribbon in half lengthwise. Using a safety pin, thread the ribbon through the casing on one side, and right around to exit on the same side. Repeat with the other piece of ribbon from the other opening. Knot the ends of the ribbon. Press.
And there you have it – a quick little pouch to hold all manner of things.
![]()
Our Guarantee
We truly believe we make some of the most innovative products in the world, and we want to make sure we back that up with a risk-free ironclad 180 day guarantee.
![]()
If you don't have a positive experience for ANY reason, we will do WHATEVER it takes to make sure you are 100% satisfied with your purchase.
Buying items online can be a daunting task, so we want you to realize that there is absolute ZERO risk in buying something and trying it out. If you don't like it, no hard feelings we'll make it right.
We have 24/7/365 Ticket and Email Support. Please contact us if you need assistance.
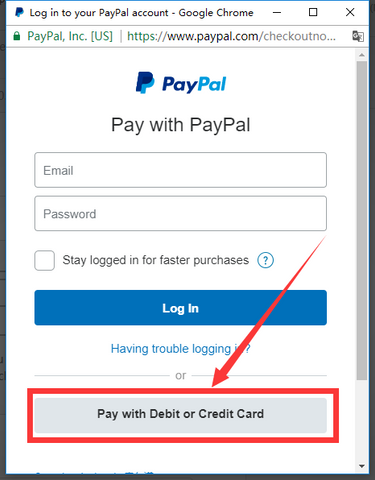
🔒Payment
PayPal is welcomed here.If you don't have a PayPal account, we accept all credit cards: just select 'PayPal' and click the 'Pay with Debit or Credit Card' button.
![]()


 This kind of bag is a great variant for storing anything, such as produce bags, sewing tools, office supplies, or they can be perfect household or beach supplies.